Structure
A deck is only as stable as what holds it off the ground. Where winters are mild, footing depth is a modest concern; where the ground freezes, it becomes the single most important structural decision. This article walks through the frame from the ground up, starting with the reason frost matters so much.
Why frost heave moves a frame
When water in the soil freezes, it expands. If a footing sits above the depth to which the ground freezes, that expansion can lift it, and an uneven lift twists the frame above. The fix is conceptually simple: place the bottom of each footing below the local frost line so the soil under it never freezes. The exact required depth is set by your municipal building authority and varies considerably across the country, so it must be confirmed locally rather than assumed.
Before you dig: Footing depth, deck attachment, and railing requirements are regulated. Confirm the required frost depth and pull any necessary permit with your local building department before construction begins.
Footings and posts
Several footing approaches are used below the frost line, each with trade-offs:
- Poured concrete piers: a hole dug below frost depth and filled with concrete, often with a form tube above grade.
- Precast pier blocks: suitable mainly for shallow, freestanding, ground-level structures, not for frost-depth applications.
- Helical (screw) piles: steel piles driven below the frost line, often used where digging is difficult.
Posts transfer the deck's load down to the footings. They should bear on the footing through a proper post base that keeps the wood off direct ground contact and resists uplift.
From posts to a level surface
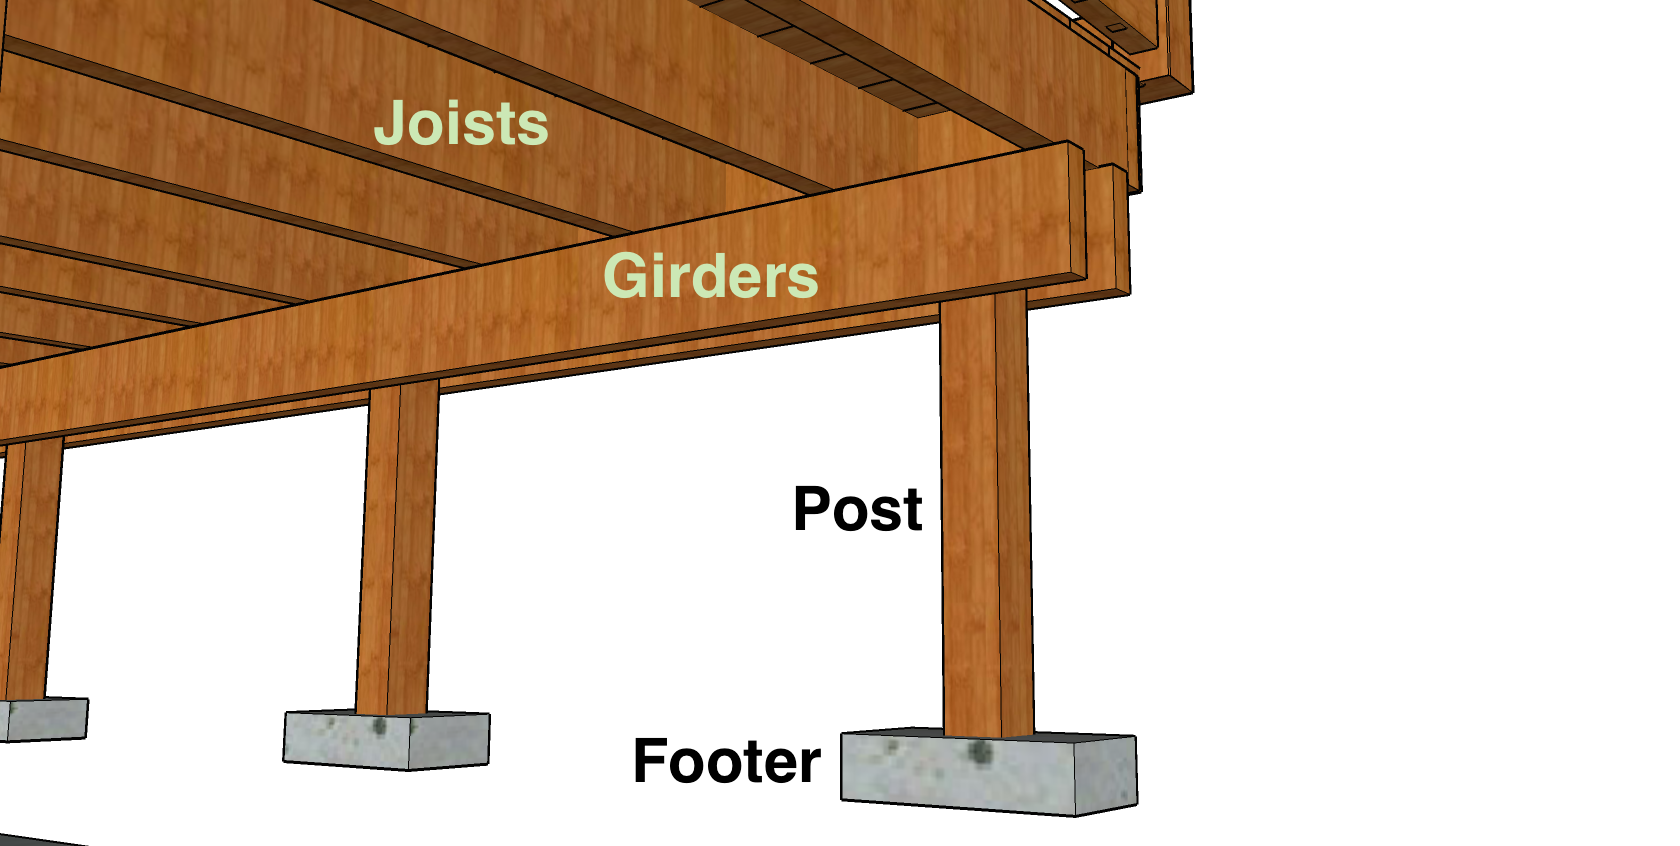
Above the posts, the frame stacks in a predictable order:
- Beams (girders): carry the joists and span between posts.
- Joists: the repeated members that support the decking; their spacing is dictated by the decking material and span.
- Ledger: where a deck attaches to the house, this board ties the frame to the building's structure.
Joist spacing and decking direction
Joist spacing is not arbitrary. Boards run perpendicular to the joists, and the maximum allowable joist spacing depends on the decking product and whether boards run straight or diagonally. Composite boards in particular often require tighter joist spacing than dimensional lumber, which is specified in the manufacturer's documentation.
The ledger is the highest-risk connection
Where a deck connects to a house, the ledger board is both a structural and a moisture-management detail. A poorly attached or unflashed ledger is a recognized cause of deck failures and of water intrusion into the building's wall. Two principles apply:
- The ledger must be fastened to the building's framing with appropriate connectors, not to sheathing alone.
- Flashing must direct water away from the joint so it cannot run behind the ledger into the wall.
Detail that pays off: Lateral load connectors, which tie the deck frame back to the house floor framing, are required in many jurisdictions. They resist the deck pulling away from the building and are inexpensive relative to the protection they provide.
A simple framing sequence
1. Confirm frost depth and permits
2. Lay out and dig footings below frost line
3. Pour or set footings; install post bases
4. Set posts and beams; check level
5. Attach and flash the ledger to house framing
6. Hang joists at the spacing the decking requires
7. Install lateral connectors and bracing
8. Lay decking, then railings and stairs